

The Ultimate Guide to Campervan Insulation: Stay Cosy, Whatever the Great British Weather Throws At You
So, you're building a campervan, or perhaps upgrading your existing one. You've got big plans for adventures across the UK, from the Scottish Highlands to the Cornish coast. But here's the deal: without proper insulation, those dreams of a cosy, comfortable retreat can quickly turn into a nightmare of condensation, damp, and shivering nights. Trust me, I've seen it countless times. Insulation isn't just an optional extra; it's the absolute foundation of a truly usable campervan, whether you're battling a winter chill or trying to keep cool during a rare British heatwave.
This guide cuts through the noise. We'll explore why insulation matters, what materials actually work, and how to install them like a pro. Forget the marketing fluff; we're talking practical, real-world advice from someone who's spent far too many hours wrestling with sticky tape and sharp knives in the back of a van.
Why Insulation is Your Campervan's Best Friend
Think of your campervan's metal shell. It's fantastic for structural integrity, but it's an absolute horror show for temperature regulation. Steel is a brilliant conductor of heat, meaning it rapidly transfers warmth out in winter and sucks it in during summer. That's why an uninsulated van feels like a fridge in January and an oven in July.
Good insulation solves this. It creates a barrier, slowing down the transfer of heat. This means your heater works more efficiently, burning less fuel and keeping you toasty. In summer, it keeps the sun's scorching rays at bay, maintaining a cooler interior. Beyond temperature, insulation also plays a huge role in sound deadening, making your van a much quieter, more peaceful space. Imagine driving down the M6 without that constant drumming noise, or sleeping soundly even when it's blowing a gale outside. That's the power of good insulation.
But here's the kicker, and it's a critical one for the UK's damp climate: insulation also fights condensation. Without it, warm, moist air from your breath or cooking hits cold metal surfaces, turning into water droplets. This leads to mould, mildew, rust, and a generally miserable living environment. A properly insulated and sealed van minimises these issues, protecting your van and your health.
Understanding the Enemy: Heat Transfer in Your Van
To beat the heat (or cold), you first need to understand how it moves. There are three main ways heat travels, and your insulation strategy needs to tackle all of them.
Conduction: The Direct Path
Conduction is heat transfer through direct contact. Think of touching a hot pan. In your van, the metal body conducts heat directly from the inside to the outside, and vice versa. Your insulation's primary job is to interrupt this pathway. Materials with low thermal conductivity (like foam boards or wool) are excellent at this. They slow down the movement of heat energy through their structure.
Convection: The Moving Air
Convection is heat transfer through the movement of fluids – in our case, air. Warm air rises, cold air sinks. If you have unsealed gaps or cavities in your van walls, air can circulate, carrying heat with it. This creates draughts and allows heat to escape or enter. Stopping air movement is crucial. This means sealing all gaps, ensuring a snug fit for your insulation, and creating a robust vapour barrier.
Radiation: The Invisible Waves
Radiation is heat transfer through electromagnetic waves, like the warmth you feel from the sun or a campfire. Shiny surfaces, like aluminium foil, are excellent at reflecting radiant heat. This is why multi-layer foil insulation often has a reflective outer layer. It bounces heat waves back, preventing them from entering or escaping your van. This effect is most pronounced when there's an air gap next to the reflective surface.
The Core Principles of Effective Campervan Insulation
You can't just slap a bit of bubble wrap on the walls and call it a day. A truly effective insulation system relies on several key principles working in harmony. Ignore any of these, and you'll compromise your comfort.
Vapour Barrier: Absolutely Critical for Moisture Control
This is often overlooked, but it's arguably the most important part of your insulation strategy, especially in the UK. A vapour barrier prevents warm, moist air from the interior of your van from reaching the cold metal surfaces or your insulation material. If that warm, moist air gets into your insulation, it will condense, making your insulation wet and useless. Wet insulation loses its effectiveness and can lead to mould, mildew, and rust in your van's structure.
A vapour barrier should be a continuous, sealed layer on the warm side of your insulation (i.e., towards the interior of the van). Think of it as a waterproof jacket for your insulation.
Air Gap: Trapping the Still Air
Still air is an excellent insulator. That's why many insulation materials, like wool or multi-layer foil, work by trapping pockets of air. When installing reflective foil insulation, creating a small air gap (around 10-20mm) on one or both sides significantly boosts its performance. Without this air gap, the reflective properties are largely negated, and it acts more like a simple thin layer of plastic.
Thermal Bridge Prevention: Stopping the Heat Leaks
A thermal bridge is a point where heat can bypass your insulation and travel directly through a more conductive material. In a campervan, the metal ribs, pillars, and window frames are prime examples. Even if you've insulated the panels beautifully, if you leave these metal elements exposed or unaddressed, they'll act like cold fingers reaching into your warm space (or hot fingers in summer).
You need to minimise these thermal bridges wherever possible. This often means using thinner strips of insulation over the metal ribs, or ensuring your main insulation layer completely covers them.
Material Choice: The Right Tool for the Job
There's no single "best" insulation material for every part of your van. A smart builder uses a combination. Different materials excel in different areas – rigid boards for flat panels, flexible fibres for cavities, and reflective foils for radiant barriers. Understanding the pros and cons of each helps you make informed choices.
Types of Campervan Insulation: What's Out There?
The market is flooded with options, each with its own benefits and drawbacks. Let's break down the most common and effective choices for UK campervan builders.
Closed-Cell Foam Boards (e.g., Celotex, Kingspan)
These are rigid insulation boards, typically made from polyisocyanurate (PIR) or extruded polystyrene (XPS). They're easily recognisable by their foil backing (PIR) or distinctive colours (XPS).
- Pros:
- High R-value: They offer excellent thermal resistance for their thickness. This means you get great insulation in a compact space.
- Rigid: Easy to cut precisely and create flat surfaces for cladding.
- Moisture resistant: Closed-cell structure means they don't absorb water, so they maintain their insulating properties even in damp conditions.
- Often have a built-in vapour barrier: The foil facing on PIR boards can act as a vapour barrier if all joints are taped meticulously.
- Cons:
- Tricky for curves: Your van isn't a perfect box. Cutting and shaping foam boards to fit curved walls and ribs is time-consuming and can leave gaps.
- Gaps are insulation killers: Any unsealed gaps between boards or around ribs become thermal bridges, severely reducing overall effectiveness.
- Cost: Generally more expensive per square metre than some other options, but the performance often justifies it. A 2.4m x 1.2m sheet of 25mm Celotex might set you back around £30-£40.
- Application: Ideal for large, relatively flat panels like the floor, ceiling, and the flatter sections of walls.
Spray Foam (e.g., Lapolla, DIY Kits)
Professional spray foam insulation is a two-part liquid that expands and hardens, creating a seamless, airtight layer. DIY kits are also available, though they require careful application.
- Pros:
- Fills all gaps: It adheres directly to the metalwork, filling every void and eliminating thermal bridges. This is its biggest advantage.
- High R-value: Excellent thermal performance.
- Adds structural rigidity: Can slightly stiffen the van's panels.
- Built-in vapour barrier: Closed-cell spray foam creates an effective vapour barrier.
- Cons:
- Messy and irreversible: Once it's in, it's in. Removing it is a nightmare.
- Expensive: Professional installation for a medium-sized van can easily run into £1,500 - £2,500. DIY kits are cheaper but still significant, costing £300-£600 for enough to do a small van.
- Difficult for DIYers: Achieving an even, effective layer without specialised equipment is challenging. Off-gassing during application requires serious PPE and ventilation.
- Application: Best for those with a larger budget seeking the absolute best, or for professional conversions.
Recycled Plastic / Polyester Fibre (e.g., MHG Textiles Polyester Campervan Insulation)
This type of insulation is made from recycled plastic bottles, processed into soft, fluffy bats or rolls. It's similar in feel to loft insulation but specifically designed for vehicle use.
- Pros:
- Sustainable: Made from recycled materials, good for the environment.
- Easy to install: Simply cut to size and push into cavities. It's soft and non-irritating, so no itchy skin.
- Good sound deadening: The fibrous structure absorbs sound effectively.
- Breathable: Unlike closed-cell foams, it allows some moisture to pass through (though this means it needs a vapour barrier).
- Doesn't compress easily: Maintains its loft, which is crucial for insulation performance.
- Cons:
- Absorbs moisture: If not protected by a robust vapour barrier, it will absorb condensation, becoming heavy and losing its insulating properties.
- Lower R-value per thickness: You'll need a thicker layer compared to foam boards to achieve the same thermal performance.
- Can settle over time: Though less prone than mineral wool, it's still a possibility.
- Application: Excellent for filling irregular cavities, ribs, and curved sections of the van where rigid boards won't fit well. It's also fantastic for acoustic insulation. A pack like the MHG Textiles Polyester Campervan Insulation, priced around £25.99, offers a good amount for filling smaller areas or supplementing other insulation types.
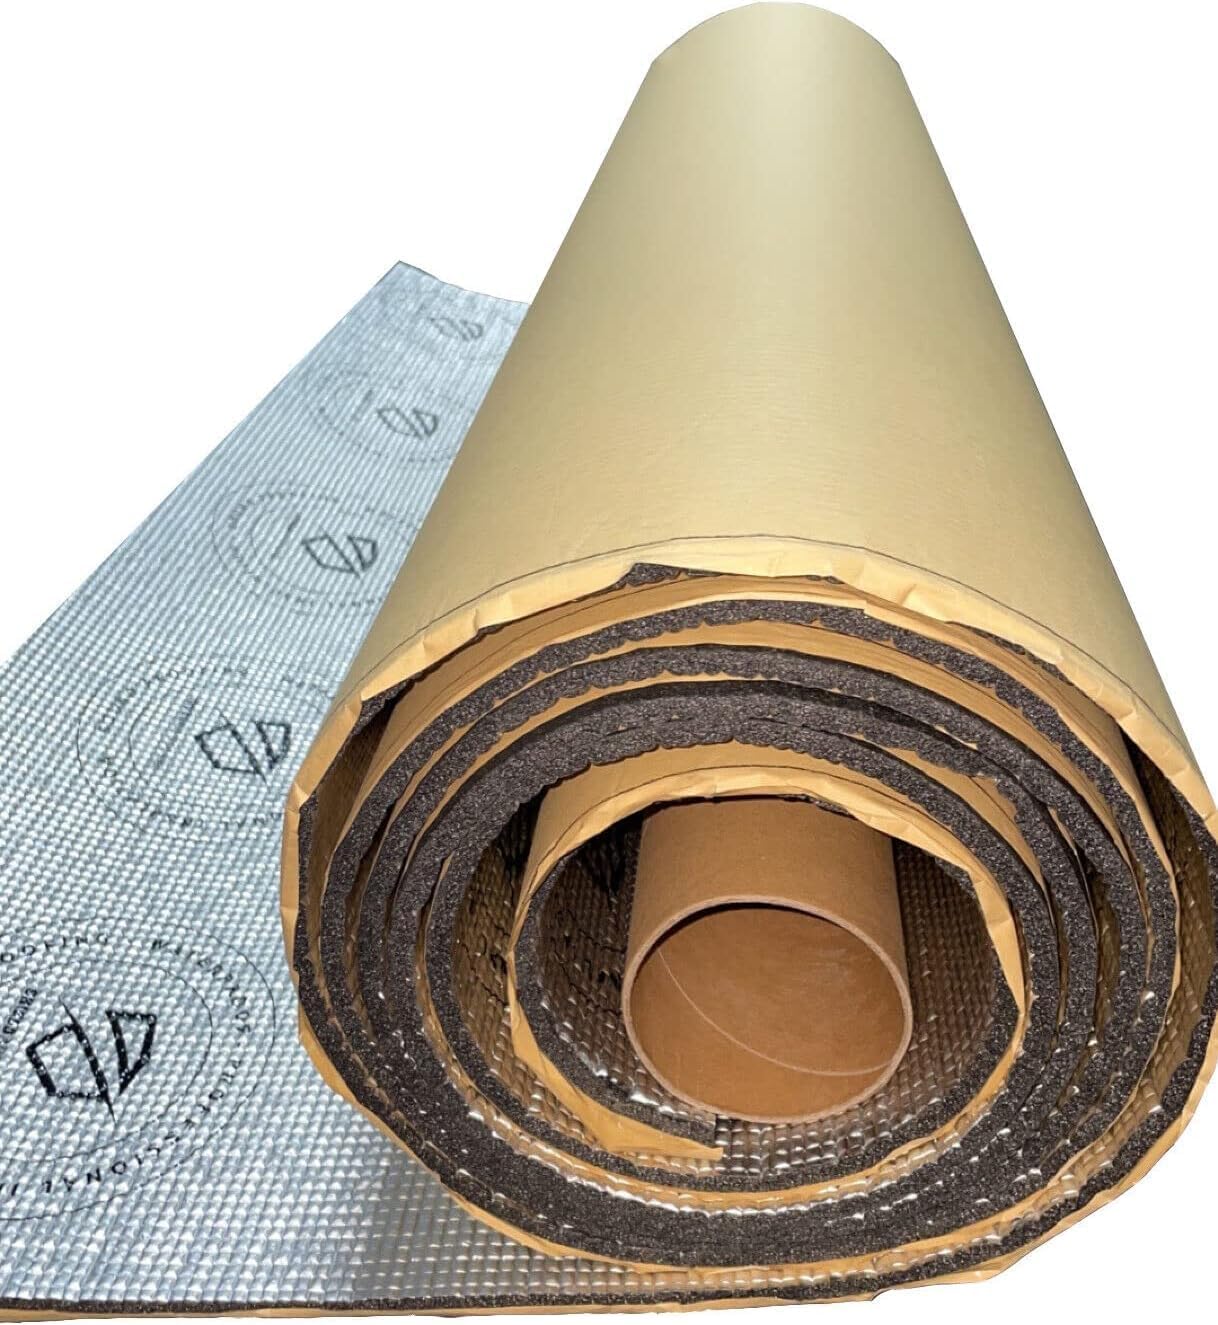
Multi-Layer Foil Insulation (e.g., Shield Autocare 7mm Campervan Thermal Acoustic Insulation)
Often called 'bubble foil' or 'reflective insulation,' this typically consists of multiple layers of reflective foil and air bubbles or foam.
- Pros:
- Radiant barrier: Excellent at reflecting radiant heat when installed with an air gap.
- Thin and lightweight: Doesn't take up much precious space.
- Easy to cut and fit: Very flexible, conforms to curves.
- Some acoustic properties: The bubble structure offers a degree of sound dampening.
- Cons:
- Relies on air gaps: Its effectiveness plummets if directly touching a surface on both sides. You must create air gaps (at least 10-20mm) for it to work as intended.
- Lower R-value on its own: Despite marketing claims, its inherent R-value (thermal resistance) is not as high as foam boards of equivalent thickness. It performs best as a radiant barrier, not a bulk insulator.
- Often misunderstood: Many builders use it incorrectly, leading to disappointment.
- Application: Best used as part of a layered system. Great for creating a thermal break over metal ribs, or as an additional radiant barrier behind panels, always with an air gap. The Shield Autocare 7mm product, priced at £36.75, is a good example of this type.
Mineral Wool (Rockwool, Sheep's Wool)
These are fibrous materials, commonly used in domestic building insulation.
- Pros:
- Good thermal and acoustic properties: Excellent at trapping air and absorbing sound.
- Breathable (sheep's wool): Natural sheep's wool can manage moisture, but it must be treated to prevent pests.
- Cons:
- Absorbs moisture (Rockwool): Standard Rockwool is highly absorbent and will sag, become heavy, and lose effectiveness if it gets wet. Not ideal for vans without an impeccable vapour barrier.
- Can settle: Over time, it can compress and leave uninsulated voids.
- Irritant (Rockwool): Glass or mineral fibres can irritate skin and lungs during installation.
- Pests (Sheep's wool): Untreated sheep's wool can attract insects or rodents.
- Application: Generally avoided by experienced van builders due to moisture concerns, unless it's a specific, treated product designed for vehicles, or used in combination with a very robust vapour barrier. Polyester fibre is a much safer, more user-friendly alternative.
The Vapour Barrier: Your Van's Unsung Hero
Let's dedicate a whole section to this because it's that important. I cannot stress this enough: do not skip or skimp on your vapour barrier. In the UK, with our generally high humidity and frequent temperature swings, condensation is a constant threat inside a van.
Why It's Crucial
Imagine you're cooking a cuppa or just breathing inside your van. You're releasing warm, moist air. This air wants to escape. As it moves towards the colder metal skin of your van, it passes through your insulation. If it reaches the cold metal, it cools rapidly and condenses into liquid water. This water then soaks your insulation, making it useless, or runs down the metal, causing rust. It's a recipe for mould, rot, and a van that smells like a damp tent.
A vapour barrier, correctly installed, creates an impermeable layer that stops this moist air from reaching the cold surfaces. It keeps your insulation dry and effective, protecting your van's structure for years to come.
How to Install It Correctly
Your vapour barrier should be a continuous, unbroken layer on the warm side of your insulation – meaning, on the interior side, just before your finished wall panels.
- Material: Use a robust polythene sheeting (at least 1000 gauge, often called 'damp proof membrane' in building supplies) or the foil face of your PIR insulation boards. Some multi-layer foils, when taped correctly, can also serve this purpose.
- Coverage: Ensure it covers all insulated areas – walls, ceiling, and doors.
- Sealing: This is key. Every single seam, joint, and penetration (like where wires pass through) must be meticulously taped with a strong, airtight tape. Think aluminium foil tape for foil-faced insulation, or a dedicated vapour barrier tape for polythene. Don't leave any gaps. Overlap sheets by at least 100mm.
- Avoid Punctures: Be incredibly careful not to puncture the vapour barrier when installing your wall panels. This is where many DIYers go wrong. Plan your screw points carefully.
In practice, a well-sealed vapour barrier means that any condensation forms on the inside of the barrier, where it can evaporate back into the air, rather than getting trapped in your walls.
Sound Deadening: A Quieter Ride
While not strictly 'insulation' in the thermal sense, sound deadening is an integral part of creating a comfortable campervan. It tackles a different problem: vibration and road noise.
Its Purpose
Your van's large, flat metal panels (sides, roof, doors) act like giant drum skins, amplifying road noise, engine hum, and vibrations. This makes for a tiring, noisy journey and a less peaceful living space. Sound deadening material adds mass and dampens these vibrations.
Materials and Placement
The most effective sound deadening material is a self-adhesive butyl rubber mat, often with an aluminium foil backing. Brands like Silent Coat or Dodo Mat are popular in the UK.
- Placement: Apply these mats to the largest, flattest sections of metal. You don't need to cover 100% of the surface; covering about 25-50% of each large panel is usually sufficient to dramatically reduce resonance. Focus on doors, side panels, and the roof.
- Application: Clean the metal surface thoroughly first. Cut the mats to size, peel off the backing, and press them firmly onto the metal, using a roller to ensure full adhesion and remove air bubbles.
- Benefits: Beyond reducing road noise, sound deadening also makes your van feel more solid and premium. It's a noticeable upgrade.
- Acoustic Insulation: Remember that some thermal insulation, like polyester fibre, also has good acoustic properties. While not a replacement for dedicated sound deadening mats, it adds another layer of noise reduction.
Step-by-Step Insulation Strategy: My Tried-and-Tested Method
This is the approach I've found most effective for a robust, long-lasting insulation job in a typical panel van. It's a layered approach, tackling each type of heat transfer and ensuring that all bases are covered.
Step 1: Clean and Prepare
Before you even think about insulation, your van's interior needs to be spotless.
- Remove everything: Seats, existing lining, any loose debris.
- Clean thoroughly: Vacuum, then wash all metal surfaces with a degreaser. Allow it to dry completely.
- Address rust: This is crucial. Treat any surface rust with a rust converter, then prime and paint. Don't insulate over rust; it will continue to spread underneath your carefully installed layers.
Step 2: Sound Deadening
This is your first layer.
- Apply butyl mats: Stick your sound deadening mats to the large, flat metal panels of your van. Focus on the side walls, roof, and door panels. You're aiming to cover roughly 25-50% of the surface area on each large panel. Use a roller for a firm, bubble-free adhesion.
- Time: This can take a few hours for a medium-sized van, depending on how meticulous you are.
Step 3: First Layer of Insulation (Cavities)
Now we start filling the voids.
- Fill the ribs: Your van has metal ribs and cross-members. These are thermal bridges. Cut narrow strips of closed-cell foam board (10-20mm thick) or use flexible polyester fibre to fill these channels. The goal is to break the direct metal-to-metal contact and trap air.
- Fill irregular cavities: Use flexible insulation like MHG Textiles Polyester Campervan Insulation to stuff into all the awkward, irregular cavities in the walls and ceiling. Push it in firmly but don't compress it so much that it loses its loft. This provides excellent bulk insulation and acoustic dampening.
- Time: This step is often the most fiddly and time-consuming, easily a full day's work for a medium LWB van.
Step 4: Second Layer / Main Insulation
This is where you create your primary thermal barrier.
- Foam Boards for Flat Sections: For the largest, flattest areas (floor, ceiling, and flat wall sections), cut closed-cell foam boards (e.g., Celotex or Kingspan, 25-50mm thick) to fit as snugly as possible. Use a strong adhesive (like Soudal Soudaflex 40FC or CT1) to glue them directly to the metalwork, or to wooden battens you've already fixed. Aim for minimal gaps.
- Multi-Layer Foil (with air gaps): If using a product like Shield Autocare 7mm, this is where it shines. First, create battens (e.g., 20mm x 20mm timber strips) on your metal ribs. Then, staple or adhere the multi-layer foil to these battens, creating an air gap between the foil and the metal skin. This air gap is absolutely essential for its reflective properties to work. You can then add another air gap and a second layer if you wish, or proceed to the vapour barrier.
- Overlap and Seal: Whichever material you choose, ensure good coverage. Cut carefully around windows and door frames.
- Time: Another full day, potentially more, depending on the complexity of your van and your chosen materials.
Step 5: The Vapour Barrier
The grand finale before your cladding goes on.
- Install the continuous layer: Drape your chosen vapour barrier material (polythene sheeting or foil-faced insulation, if using that as your barrier) over all your insulation, covering the walls, ceiling, and doors.
- Seal every seam: Use a high-quality, airtight tape (e.g., aluminium foil tape for foil barriers, or a dedicated vapour barrier tape) to seal every single joint, seam, and overlap. Overlap sheets by at least 100mm.
- Seal around penetrations: Any wires, pipes, or structural elements that pass through the barrier must have their entry and exit points meticulously taped and sealed. This creates a continuous, uninterrupted barrier.
- Time: Allow a good half-day to a full day for this, as precision is paramount. Rushing this step will compromise your entire insulation effort.
Product Deep Dive: CamperBrain's Top Picks for UK Builders
We've talked theory, now let's look at a couple of popular products available right here in the UK that fit perfectly into the layered approach we've discussed.
Shield Autocare 7mm Campervan Thermal Acoustic Insulation
- Description: This is a multi-layer foil insulation product, 7mm thick, designed to offer both thermal and acoustic benefits. It typically comes in rolls, often 10m long by 1m wide. It's lightweight and flexible.
- Pros:
- Thin and Lightweight: It takes up minimal space, which is always a bonus in a campervan.
- Good Radiant Barrier: When installed correctly with an air gap, it's effective at reflecting radiant heat. This means it helps keep heat out in summer and in during winter.
- Acoustic Properties: The trapped air bubbles and layers offer a degree of sound dampening, reducing road noise and vibrations.
- Easy to Cut and Fit: Its flexibility makes it simple to cut with scissors and conform to the van's curves.
- Moisture Resistant: The closed-cell foam and foil layers resist water absorption.
- Cons:
- Relies Heavily on Air Gaps: This is its biggest caveat. Without a sealed air gap (10-20mm) on at least one side, its radiant barrier properties are largely nullified, and it acts more like a thin, inefficient foam layer. Many builders make the mistake of just sticking it directly to the metal.
- Lower R-value on its own: As a bulk insulator, it's not as effective as thicker foam boards. It's best used as part of a system, not as a standalone solution for extreme temperatures.
- Needs Careful Installation: To maximise its performance, you need to create battens to ensure those crucial air gaps.
- Best for: Creating a thermal break over metal ribs, acting as a radiant barrier layer behind your main insulation or cladding, or as an additional layer for acoustic benefits. It's also useful for insulating doors and smaller, awkward panels where thicker materials won't fit.
- Price: Around £36.75 for a roll (check specific roll length for coverage).
- My Opinion: "This is a fantastic product for specific uses, especially as a radiant barrier and a thermal break. However, it's not a standalone solution. Don't expect it to perform miracles if you just stick it directly to the metal. Combine it with thicker insulation and always ensure those critical air gaps. It's an excellent addition to a layered system."
MHG Textiles Polyester Campervan Insulation
- Description: This is a soft, fibrous insulation made from recycled polyester plastic bottles. It comes in rolls or bats, typically 50mm or 100mm thick. It's designed to be non-irritating and easy to handle.
- Pros:
- Eco-Friendly: Made from recycled materials, appealing to environmentally conscious builders.
- Easy to Fit into Cavities: Its flexibility allows it to be easily pushed into the irregular shapes and voids of your van's ribs and cavities, ensuring good coverage.
- Excellent Acoustic Properties: The fibrous structure is superb at absorbing sound, significantly reducing road noise and improving the overall quietness of your van.
- Breathable and Non-Irritating: It doesn't cause skin irritation like some mineral wools, making installation much more pleasant. It also allows some moisture to pass through (though this means a vapour barrier is still crucial).
- Maintains Loft: It resists compression, ensuring it continues to trap air effectively.
- Cons:
- Can Absorb Moisture: If not completely protected by a robust and continuous vapour barrier, it will absorb condensation, becoming damp and losing its insulating properties. This is a critical point.
- Lower R-value per thickness: Compared to rigid foam boards, you need a thicker layer of polyester fibre to achieve the same thermal resistance. This might be an issue where space is extremely limited.
- Not a Structural Material: It provides no structural rigidity to your panels.
- Best for: Filling all the awkward, irregular cavities and ribs in your van's walls, ceiling, and doors. It's also fantastic as a primary acoustic insulation layer.
- Price: Around £25.99 for a pack (check specific pack size and coverage).
- My Opinion: "A solid, user-friendly, and eco-friendly choice for cavity filling. It's excellent for acoustic dampening and easy to work with. Pair it with a high-quality vapour barrier, and you've got a fantastic base layer that will keep you warm, quiet, and condensation-free. Don't rely on it alone for the main bulk insulation if you're aiming for extreme cold weather performance, but it's brilliant in combination with foam boards."
Common Insulation Mistakes to Avoid
Even experienced builders can make these blunders. Learn from them!
- No Vapour Barrier (or a Leaky One): This is the biggest killer of insulation effectiveness and the primary cause of mould and rust. A gap in your vapour barrier is like a hole in a boat. Seal everything.
- Compressing Insulation Too Much: Whether it's polyester fibre or multi-layer foil, insulation works by trapping air. Squeezing it flat reduces the amount of trapped air, thus reducing its insulating value. Fit snugly, but don't squash it.
- Leaving Air Gaps / Thermal Bridges: Any uninsulated gap or exposed metal rib acts as a pathway for heat. Be meticulous in cutting and fitting your insulation, and address those metal ribs.
- Not Sound Deadening First: Thermal insulation does offer some acoustic benefits, but it's not a replacement for dedicated sound deadening mats on those resonant metal panels. Do the sound deadening first for a truly quiet van.
- Using Household Insulation (Without Proper Sealing): Standard fibreglass or rockwool loft insulation is designed for houses, where a breathable membrane allows moisture to escape. In a sealed van environment, these materials are highly prone to soaking up condensation and becoming ineffective, heavy, and mouldy. Stick to products designed for vehicles or ensure an absolutely perfect vapour barrier.
Costing Your Insulation Project (UK Focus)
Insulation is an investment, but it's one that pays dividends in comfort, fuel efficiency, and the longevity of your van. Here's a breakdown of typical costs for a DIY job on a medium (LWB) panel van in the UK:
- Sound Deadening (Butyl Mats): Expect to spend around £80 - £200 for enough mats to cover key areas.
- Closed-Cell Foam Board (Celotex/Kingspan): For walls, floor, and ceiling, this could be £150 - £300, depending on thickness and coverage.
- Polyester Fibre (MHG Textiles): For filling all those awkward cavities, budget £50 - £150.
- Multi-Layer Foil (Shield Autocare): If used as an additional layer or thermal break, £50 - £150.
- Vapour Barrier Plastic (1000g polythene): A roll will likely cost £20 - £40.
- Vapour Barrier Tape / Aluminium Foil Tape: Don't skimp here. High-quality tape will be £10 - £30.
- Adhesives / Sealants (Soudal Soudaflex, CT1, etc.): You'll need several tubes. Budget £30 - £70.
- Tools (Roller, Knives, PPE): If you don't have them, add £30 - £50.
Total Estimated DIY Cost: For a comprehensive, well-insulated LWB van, you're realistically looking at £400 - £800. This might seem like a lot, but it's a fraction of the cost of a professional conversion and makes an enormous difference to your living experience.
Professional Spray Foam: If you opt for professional closed-cell spray foam, expect costs to be significantly higher, typically £1,500 - £2,500 for a full van. It's a premium option, but it does offer unparalleled, seamless coverage.
The Verdict: My Final Thoughts on Insulating Your UK Campervan
Insulating your campervan properly is not the most glamorous part of the build, but it's arguably the most important. It dictates your comfort, protects your investment from moisture damage, and enhances your overall enjoyment of the van. Don't cut corners here.
My advice is always a layered approach. Don't rely on a single miracle product. Start with sound deadening, then fill cavities with flexible, breathable insulation like MHG Textiles Polyester Fibre. Follow this with rigid foam boards for flat surfaces, or a carefully installed multi-layer foil like Shield Autocare 7mm (remembering those air gaps!). Finally, and critically, seal everything with a continuous, robust vapour barrier.
Think of your van as a giant thermos flask. You want to keep the warmth in during winter and out during summer, all while preventing condensation. It takes time, patience, and attention to detail, but the reward is a truly comfortable, quiet, and long-lasting home on wheels, ready to tackle whatever the unpredictable British weather throws at it. Happy building!